第 1 号 商品写真
製品写真: ガラスの瓶
スタジオの背景紙にガラスの瓶。屈折と反射を Cycles 128 サンプルで。
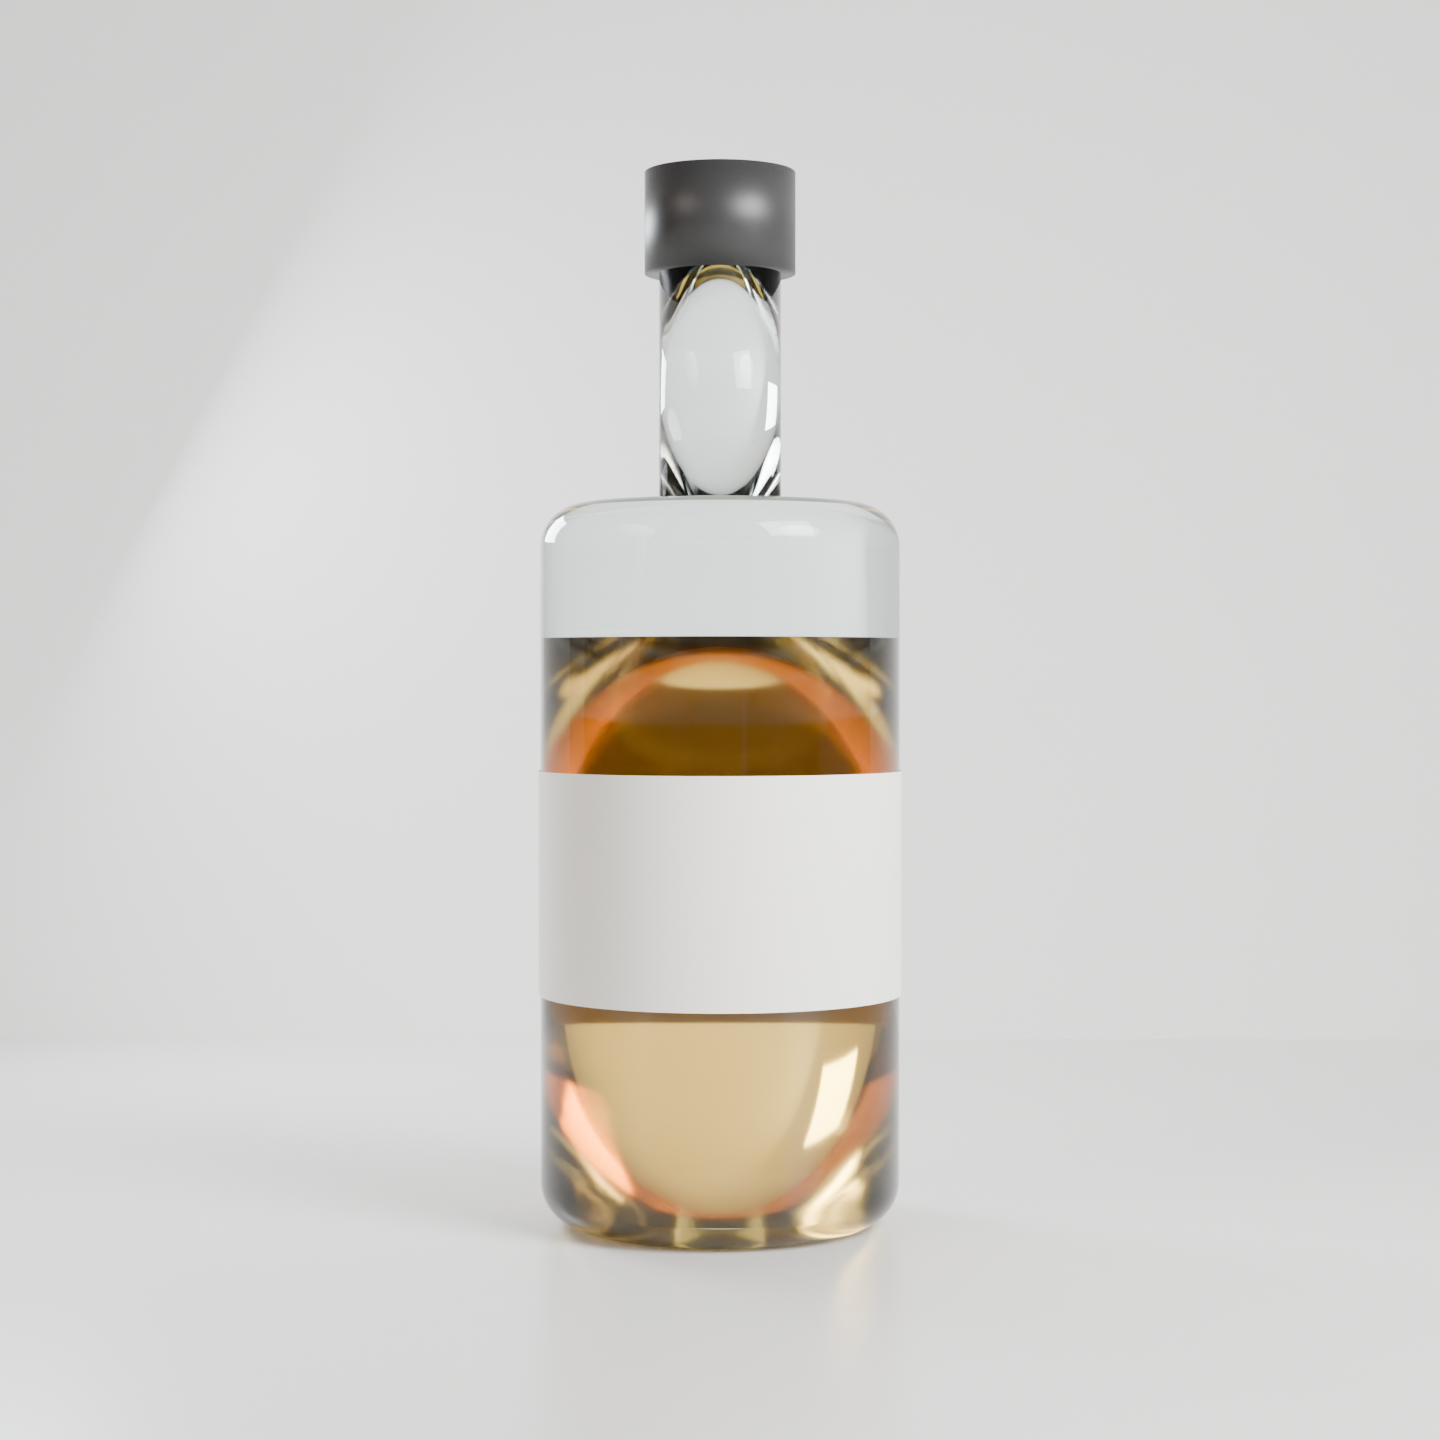
本番の GPU で描いた本物の結果と、そのまま動く bpy スクリプト、設定、GPU 秒。スクリプトの URL を scene_url に渡せば同じものが出ます。本番の GPU で 166.5 GPU 秒、0.1 円/GPU 秒で 16.7 円。
写っているもの
継ぎ目のない白い背景紙に、ラベルの付いた琥珀色の液体の瓶。ガラスはスタジオの柔らかい映り込みを拾い、中の液体が透けて見えます。実物の見本ができる前に、商品ページが必要とする種類の絵です。
シーンの組み方
スクリプトが組むのはシーン・カメラ・コマ範囲だけ。品質を決めるもの(解像度・サンプル数・ノイズ除去・どの GPU か)は描くときにサービスが決めるので、同じスクリプトで速い試し描きにも 1440 px の仕上げにもなります。
自分用に変える
スクリプトで瓶の形やラベルの色を変え、studio のプリセットのまま、まず 4 コマの試し描きを頼みます。試し描きには判定が付くので、暗い・白飛びした絵は仕上げに払う前に分かります。
16.7 円 でこの 1 枚。新しい鍵の無料のようこそクレジットなら、カード無しで約 6 回分。
この作例を自分の AI で描く
ChatGPT · Claude · Grok · Perplexity
JANCTION Render(MCP サーバー https://render.janction.jp/mcp)で、この作例を描いて: render_preview(scene_url="https://render.janction.jp/samples/ex01_product_bottle.py")。そのあと、私の題材に合わせて色・形・カメラを変える案を出して。仕上げの前に確認して。
リンクを押すと、下の文が入った状態でそのアプリが開きます(入らないときは写して貼ってください)。そのアプリに JANCTION Render をまだつないでいなければ、先にコネクタとして https://render.janction.jp/mcp を足してください。
Blender の警告
- environment preset 'studio' replaced the scene's world (HDRI lighting)
スクリプト(bpy、そのまま動く)
ex01_product_bottle.py。シーン・カメラ・コマ範囲だけを組み、解像度・サンプル・ノイズ除去・GPU はサービスが決めます。
"""JANCTION Render example 01: product shot of a glass bottle on a studio backdrop (one still).

Reproduce: render_final(scene_url="https://render.janction.jp/samples/ex01_product_bottle.py",
                        width=1440, height=1440, samples=128, environment="studio")
The service sets resolution, samples, denoising and the GPU; this script only builds the scene,
the camera and the frame range.
"""
import math

import bpy
from mathutils import Vector

for ob in list(bpy.data.objects):
    bpy.data.objects.remove(ob, do_unlink=True)
scene = bpy.context.scene
scene.frame_start = 1
scene.frame_end = 1


def material(name, color, roughness=0.5, metallic=0.0, **inputs):
    mat = bpy.data.materials.new(name)
    mat.use_nodes = True
    bsdf = mat.node_tree.nodes["Principled BSDF"]
    bsdf.inputs["Base Color"].default_value = (*color, 1.0)
    bsdf.inputs["Roughness"].default_value = roughness
    bsdf.inputs["Metallic"].default_value = metallic
    for key, value in inputs.items():
        bsdf.inputs[key].default_value = value
    return mat


def smooth(ob):
    for p in ob.data.polygons:
        p.use_smooth = True
    return ob


def add(op, name, mat=None, **kw):
    getattr(bpy.ops.mesh, op)(**kw)
    ob = bpy.context.object
    ob.name = name
    if mat is not None:
        ob.data.materials.append(mat)
    return ob


def look_at(ob, target):
    ob.rotation_euler = (Vector(target) - ob.location).to_track_quat("-Z", "Y").to_euler()


def camera(location, target, lens=50.0, sensor_fit="AUTO"):
    data = bpy.data.cameras.new("Camera")
    data.lens = lens
    # VERTICAL keeps the same vertical framing at any aspect: the square final (1440x1440) and the 16:9 preview (1280x720)
    # both show the whole bottle (AUTO fitted the width, so the wide preview cut off the cap)
    data.sensor_fit = sensor_fit
    if sensor_fit == "VERTICAL":
        data.sensor_height = 24.0
    cam = bpy.data.objects.new("Camera", data)
    scene.collection.objects.link(cam)
    cam.location = location
    look_at(cam, target)
    scene.camera = cam
    return cam


def light(name, kind, location, energy, target=None, size=1.0, color=(1.0, 1.0, 1.0)):
    data = bpy.data.lights.new(name, kind)
    data.energy = energy
    data.color = color
    if kind == "AREA":
        data.size = size
    ob = bpy.data.objects.new(name, data)
    scene.collection.objects.link(ob)
    ob.location = location
    if target is not None:
        look_at(ob, target)
    return ob


glass = material("Glass", (0.85, 0.95, 0.92), roughness=0.04, **{"Transmission Weight": 1.0, "IOR": 1.45})
liquid = material("Liquid", (0.95, 0.55, 0.12), roughness=0.08, **{"Transmission Weight": 1.0, "IOR": 1.36})
cap = material("Cap", (0.03, 0.03, 0.03), roughness=0.45)
paper = material("Label", (0.96, 0.94, 0.88), roughness=0.7)
floor = material("Floor", (0.82, 0.82, 0.8), roughness=0.3)
wall = material("Wall", (0.9, 0.9, 0.88), roughness=0.8)

# The backdrop colour for camera rays only (11/12): a turntable of this sample (orbit=True) hides the backdrop wall on the
# frames where the camera passes behind it, and the camera then sees the world. Light from the world is unchanged, so the
# still render looks the same as before.
world = scene.world or bpy.data.worlds.new("World")
scene.world = world
world.use_nodes = True
wn, wl = world.node_tree.nodes, world.node_tree.links
for n in list(wn):
    wn.remove(n)
w_out = wn.new("ShaderNodeOutputWorld")
w_light = wn.new("ShaderNodeBackground")
w_light.inputs["Color"].default_value = (0.05, 0.05, 0.05, 1.0)
w_seen = wn.new("ShaderNodeBackground")
w_seen.inputs["Color"].default_value = (0.62, 0.62, 0.6, 1.0)
w_path = wn.new("ShaderNodeLightPath")
w_mix = wn.new("ShaderNodeMixShader")
wl.new(w_path.outputs["Is Camera Ray"], w_mix.inputs["Fac"])
wl.new(w_light.outputs["Background"], w_mix.inputs[1])
wl.new(w_seen.outputs["Background"], w_mix.inputs[2])
wl.new(w_mix.outputs["Shader"], w_out.inputs["Surface"])

add("primitive_plane_add", "Floor", floor, size=24)
back = add("primitive_plane_add", "Backdrop", wall, size=24, location=(0, 4, 6))
back.rotation_euler = (math.pi / 2, 0, 0)

body = add("primitive_cylinder_add", "Bottle", glass, radius=0.5, depth=2.0, location=(0, 0, 1.0), vertices=96)
bev = body.modifiers.new("Bevel", "BEVEL")
bev.width = 0.12
bev.segments = 10
smooth(body)
neck = add("primitive_cylinder_add", "Neck", glass, radius=0.17, depth=0.7, location=(0, 0, 2.3), vertices=64)
smooth(neck)
inner = add("primitive_cylinder_add", "Liquid", liquid, radius=0.45, depth=1.55, location=(0, 0, 0.85), vertices=96)
smooth(inner)
top = add("primitive_cylinder_add", "Cap", cap, radius=0.21, depth=0.28, location=(0, 0, 2.78), vertices=64)
smooth(top)
label = add("primitive_cylinder_add", "Label", paper, radius=0.505, depth=0.62, location=(0, 0, 0.95), vertices=96,
            end_fill_type="NOTHING")
smooth(label)

light("Key", "AREA", (3.0, -3.0, 4.0), 450, target=(0, 0, 1.2), size=2.5)
light("Rim", "AREA", (-3.0, 3.0, 3.0), 250, target=(0, 0, 1.4), size=1.5, color=(0.9, 0.95, 1.0))
camera((0.0, -7.8, 1.5), (0.0, 0.0, 1.45), lens=50, sensor_fit="VERTICAL")